
How to Track Your Internship and Job Applications

It’s that time of year again! The days are getting shorter, the wind blowing colder, and us students becoming older. As we are working through another semester, we are also applying for internships in the spring and summer seasons.
This can be a frustrating and insane process. Some employers are very student-specific and have designed what their potential candidate might look like while others are searching for a motivated student with a passion to learn. Because of this many employers won’t even look at a student’s application unless they have earned a 3.0 or 3.5 GPA or higher.
This is one of the many reasons the internship application process can become overwhelming. Using a simple Excel file I created last year, I can track the application date, my interviews, and even find the link where I applied to the posting.
Admittedly it’s not the most beautiful worksheet, but it offers many functions, and you can customize it to fit your own needs.
Because this worksheet spans several columns, I took screenshots of every 4–5 categories and explained my reasoning behind each one to make it easier to understand. If you want to stop reading now and start entering your internship, no hard feelings. Simply scroll to the bottom of this and look for the download link. The file has one example to show you a bit of how it works.

The first four columns show the company, job title, location, and (new this year) if it’s going to be virtual or not. I included the company name first for two reasons. One is that when you are typing “Social Media Marketing Internship” for the 12th time, it’s confusing to find the company you are looking for. The second being that it’s easier to see how many positions you have applied for within the same company.
Job title is pretty self-explanatory and typically where I place the term of the internship. Because I am only looking for summer internships these all are summer 2021 internships so there’s no need to include a “term” column in my case. If you want to, go for it! Simply right-click the letter above the column and click “add table column.”
The location column states where you will be working or where the company’s HQ is if it’s a virtual internship. This allows me to easily find and sort if I want to apply for an internship in Pittsburgh or York. As you type cities in, Excel will try to help you out by automatically filling it in for you.
The virtual category simply asks if the internship is onsite or virtual. Personally, I’m looking for one in person, but considering the circumstances, it’s likely that you’ll find many virtual internships.
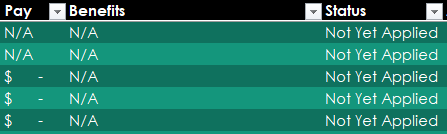
This portion of the spreadsheet lets you take note of the pay, benefits, and status of your application. Of course, we all want to find a paid application, but many don’t offer compensation other than college credit. This column automatically formats the number you put into a dollar amount. For example, typing 12 will make it $12.00. This is helpful when choosing between a few different internship offers.
The benefits column is more or less of a fun column and helps you narrow your choices. This can include anything from free lunch, subsidized housing, to even a relaxed dress code.
The status section is one of the most important parts of the tracker. This is where you give yourself status updates such as “Applied” or hopefully “Offered Position.” I would recommend using at least 7 different statuses such as Not Yet Applied, Applied, Interviewing, Interviewed, Awaiting Response, and Offered Position or Declined. This lets you accurately track each step of the application process along the way.

The document already includes a slicer which is shown to the left. These are a convenient way to organize your document and find a specific internship. You can create one for any column by clicking anywhere in the table, going to the table design tab in Excel, and clicking “create slicer” in the second section. This will open a window where you select any or all slicers you want. To use the slicer simply click on the option you want or click while holding down control (or command for Apple people) and select multiple options.

This picture is the next set of columns and is another important section. It shows when you applied, interview dates, and if you received an offer or not. I have spots for up to three interviews as some employers will have a screening or phone interview, Zoom or in-person interview, then a final interview or job offer. Excel will recognize if you put a date in such as 6/28/20. It might correct it to 6/28/2020, but you will be able to see that it’s a date. If you click on two formatted dates and put a minus sign between, Excel will calculate the days in between for you as well. (An example would be =A2 — B2. A2 and B2 are cells with dates.)
The last two columns show offer and applicant conclusion. I use the offer column to put the date that I was offered the position. Applicant conclusion or simply conclusion is set to equal the value that you put in the status column. I did it this way so you can keep track of your application process easier, as this is also the last column in the tracking section. Feel free to remove this by simply clicking the cell and deleting the = sign.

The last section is also very helpful. This includes the interest level, qualifications, qualified, website, and link columns. I use the interest column to show which internships I would be most excited to receive. It’s based on a scale of low, medium, or high. I’ll have low interest in an internship that checks a few of my boxes, or I’m not necessarily qualified for. Medium interest means that I would enjoy working in this role, but there are others that I would prefer. An internship marked as high is one that I dream of working in and feel that I would have a great experience
Qualifications can be used in many ways. I typically find the minimum grade the employer is looking for and place that in this column. You can also use it to type in certain classes or majors that the employer is looking for an ideal candidate. This allows you to have a better chance of getting an internship that’s related to your area of study.
The next question is simply a quick analysis and asks if you are qualified for the position. 95% of the positions I apply for, I’m qualified for based on college credits. The other 5% are typically reach internships that would be great if I was considered for, but I’m not likely to get.
Website and application link are used together. This year I’ve found internships on my college’s career site, Indeed, and LinkedIn. I have also directly searched for companies such as Microsoft and Google. Use this column to type where you found the posting. In my example, it says “YCP” meaning that these internships were found on my college’s career site.
Application link is the final column and is used to simply paste the link into. This makes it very easy to refer back to the posting. It’s important to have this open while conducting a phone interview as the employer might ask if you have questions or even talk more about the position. I am a visual learner, so this helps me to understand the position more while speaking to the interviewer.
I use this tool religiously while searching for internships and will probably use it as well after graduating to aggregate all the information about the jobs I’m applying to.
This is only a template, so feel free to use it and change it to your liking. If you think something should be added, changed, or removed, drop a comment. Thanks for reading and I hope you gained something valuable from this. Best of luck with your future endeavors!
Click here for the download link. (It’s from my Dropbox so there are no viruses if you were worried.)